
Thursday, July 31, 2014
Wednesday, June 18, 2014
You’ll Never Believe How Many Lightsabers Disney Sells Every Year

See the whole article here on Variety

Latest SWTOR News
Welcome to Game Update 2.8: Spoils of War!
06.10.2014 Game Update 2.8: Spoils of War is now live! Join the celebration of Soovada on Nar Shaddaa.
Developer Update: Spoils of War
06.09.2014 Find out more about new in-game events and Operation Group Finder changes in Game Update 2.8: Spoils of War.
The Star Wars: The Old Republic Community Cantina Tour Arrives in San Diego, California!
05.20.2014 We’re happy to announce that the next stop in the Star Wars™: The Old Republic™ Community Cantina Tour will be happening on Friday, July 25th, in San Diego!
Tuesday, October 20, 2009
Star Wars: The Old Republic Update: New Planet Revealed!
Check out the latest planet to be unveiled in the Old Republic.
Welcome to BALMORRA:

Welcome to BALMORRA:
Tuesday, September 15, 2009
The Force Unleashed: Tatooine DLC Walkthrough
You start off getting dropped on Tattoine.
Go to Jabbas:
As you head up the path to Jabbas you kill some Jawas (always fun) and droids.
When you see the Jawa Sandcrawler go up to it's left side (as you are facing it) and force push it off the bridge. Work your way through the landslide while double jumping/dashing over the holes. Watch for Tusken Snipers as they must like Jabba since they are guarding the entrance area. When you get to Jabbas front door, the little Robo-Eyeballs pop out the door. You must zap them with lightning to short out the security.
At Jabbas:
Battle some of Jabbas Gamorrean Guards until Jabba opens the door and invites you in.
Cutscene: Talk to Jabba, he gets PO'd and drops you in the Rancor Pit.
While dodging the boulders being hurled by the Rancor, use the force to lift the door and go through. Wait for the Rancor to come after you and drop the door on his head (Luke did it, why not try it yourself). Now flee the area, cut off a Robo-Eyes to open the doors, kill more baddies. Use force lightning to disable the electric field generators in the ceiling.
When you get to the Droid Torturing room, use the force to sizzle the power droids feet a couple times for an achievement. Use the force to lift the power core on the left side of the door, this will disable the force field and you can pass through.
Repeat to enter the room of Hacked Purge Troopers. Kill them off and use the force to open the doors and jump into the tube. Enter the room with the giant crushing roller. Toss a few Jawas under the roller to get an achievement.
Hey Look, your old Pal Proxy is here, but he's in pretty bad shape. Use the force to pick up Proxy and hold him in front of the Big Robo-Eye in the corner. He will trick the scanner and the crushing roller will lift. Now run and jump through the doors and fire. Just before the end of the tunnel there is a decending tube on the left, jump in it.
Cutscene intro to Boba Fett. It seems the easiest way to down Boba is to constantly zap him with Lightning. So keep dodging and zapping till his jetpack goes wacky and sends him smashing to the ground. Then do the Quicktime Kill.
Now you meet up with Obi-Wan in the Space Port, fight him and then do the Quicktime Kill.
Now you get to fight the Ghost of Obi-Wan who is really only effected by Lightning.
The end.
All in All, quite lame compared to the original game.
Two DLC's and both are pretty useless.
Is Star Wars Galaxies finally rolling over and dying?
After 6 years, Star Wars Galaxies is Killing off 12 servers.
http://forums.station.sony.com/swg/posts/list.m?topic_id=994876
With the coming of Star Wars: The Old Republic, who really cares?
I personally stopped playing Galaxies about a year ago when I just couldn't stand it anymore.
I loved my characters, I loved my homes and all the decorations.
But there was never anything to do. It became BORING!
Thursday, July 2, 2009
Get ready to pee your pants
You have got to see this, http://www.youtube.com/watch?v=Z4Y4keqTV6w
If you don't laugh, you have no pulse.
If you don't laugh, you have no pulse.
Wednesday, June 17, 2009
G4 Interview With Bioware's Tom Nichols
Check out this interview regarding Star Wars The Old Republic MMO
http://g4tv.com/videos/39173/Star-Wars-The-Old-Republic-E3-2009-EP-Interview/
http://g4tv.com/videos/39173/Star-Wars-The-Old-Republic-E3-2009-EP-Interview/
Friday, June 12, 2009
Missing Adult Alert!!! Missing Adult Alert!!!
Missing Adult Alert!!!
http://www.loosenuts.com/kelley.htm
Please Click the link, take a look, pass it around and Pray.
http://www.loosenuts.com/kelley.htm
Please Click the link, take a look, pass it around and Pray.
Thursday, June 11, 2009
Check out this new Trailer for The Old Republic MMO
Get a taste of what the mood was like in The Old Republic with this Trailer.
Friday, March 6, 2009
New Boba Fett BlackBerry Themes
Checkout my new Boba Fett BlackBerry Themes
that I did for the 7100, 8100 and 8300 phones.
that I did for the 7100, 8100 and 8300 phones.

Currently I only have the "Today" layout available.
I'll be doing Icon and Zen versions soon.
I've also got a 501st Blackberry theme and a Star Wars: The Old Republic Bounty Hunter Blackberry Theme available for download.
Friday, December 12, 2008
The Force Unleashed: Jedi Temple DLC Walkthrough
The Force Unleashed's first level DLC is the Jedi Temple. The Apprentice returns the the ruins of the Jedi Temple on Corusant to find out more information about his father.
Go ahead and start off on the easy level. You need to do every difficulty if you want to get all the achievements anyways so you might as well start off easy and learn your way around.
Unless like me, once you do it you decide "Ehh, not worth doing again".
You start off sliding down the ramp of your ship and dropping to a landing pad below.
Get ready for a fight! Once you land you are hammered by Every Storm Trooper known to the game. If you head up the walkway, some energy shields will pop up and block some of the fire coming from the ones guarding the door. I found it easiest to shove most of the baddies off the side of the platform rather then fight them head on.
Once you deal with the soldiers there are two beams forming an X in front of the door, use the force to move them up and the door will open.
Once inside you need to fight more baddies then use the force to raise the door on the right side (as you enter) of the entrance room. Run through the door before it drops shut.
Drop down the hole and enter the "Training Arena". A bunch of droids armed with Lightsabers will start attacking you. You can earn a ton of points fighting the droids and they will keep coming until you take out the "projectors" that create them. When you get tired of fighting droids, jump up to the second level and run around destroying the projectors that encircle the arena. Kill off the last of the droids and a cut scene will show a door on the upper level opening.
Go through that door and down the hall. You will come out on a broken balcony in the Chasm.
Kill off the flying stormies that keep pestering you and use the force to lift the broken walkway on your right (it will be flashing blue). Again a cut scene shows the door that you entered the "Training Arena" opening back up. Head back down the hall and go back through the arena killing the droids that have entered the room when the floor opened up. Go back out the door that you used to enter the Arena and go back up the hole, use the force to raise the door and go back to the main entrance area.
Fight more baddies that appear (where were they before?) and use the force to blast the face off the statue, then use the force to clear away the debris blocking the hallway on the other side (left side as you enter) of the entrance room.
Go down the hall and once again, use the force to raise a door. Stand off to the right side as you open the door so you don't get nailed by the snipers inside the room. Kill all the baddies in that room (use the big ball to kill 10 for an achievement) and go through the hallway further in the room on the right. Drop down the hole, walk down the hall and you are on a balcony in the chasm again. Toss your Lightsaber at the statue to send it crashing to the ground.
Go back up the hole, kill more baddies (where do these guys come from), use the force to lift the door again, exit the room, down the hall, back to the main entrance, kill more baddies and finally force jump the chasm (Double Jump and Dash to make it across ala Junk Yard), I had the hardest time making this jump. Just keep trying and wait until the very last step to jump.
Now the game gets really boring. Watch a cutscene, use the force to move a glowing ball along a glowing line, rinse and repeat. Use the force to move some broken walkway segments into place so you can jump across the "void". This part is very lame.
Finally you reach the Boss. Just keep jumping and hacking and blasting and shocking him.
You will eventually beat him, game over.
Overall, not worth the $10.
Friday, November 7, 2008
Wednesday, October 15, 2008
Join the dark side and grab a lightsaber
| Join the dark side and grab a lightsaber SDSU Collegian - Brookings,SD,USA Lightsaber in hand, you can lift, throw, crush, electrocute and otherwise dominate stormtroopers, Wookiees and Jawas alike. Your ability to channel the ... |
Tuesday, October 14, 2008
Micro-sized R2 Unit Provides a Cure for the Blues
|

A Bedtime Ritual to Stimulate Your Kids' Imaginations (and Yours, Too)
| A Bedtime Ritual to Stimulate Your Kids' Imaginations (and Yours, Too) Wired News - USA Just the other day, I gave my son, who has recently gone crazy for all things Star Wars, his own functional lightsaber, which has been modified so that the ... |
Wednesday, October 1, 2008
Little Lucy Sprecher
Little Lucy Sprecher went to heaven yesterday. She was only 5 but she had incredible faith.
I owe her a dance because I told her when she was in the hospital that I would dance with her the next time she saw me.
So Lucy, I look forward to the day I finally get to be with Jesus too. You and I will dance for him and sing and laugh.
Thank you for sharing your life with us, you changed me.
I owe her a dance because I told her when she was in the hospital that I would dance with her the next time she saw me.
So Lucy, I look forward to the day I finally get to be with Jesus too. You and I will dance for him and sing and laugh.
Thank you for sharing your life with us, you changed me.
Tuesday, September 30, 2008
Downloadable Content Soon To be Unleashed
An announcement on The Official Star Wars Site tells us that there will be a new single player level "The Jedi Temple" and some new playable characters (can you say Kit Fisto!) available for download sometime in the near future.
 The new content will be available for the Xbox 360 and PS3 versions of the game only.
For more info check out this link StarWars.com Downloadable Content Soon To be Unleashed
 The new content will be available for the Xbox 360 and PS3 versions of the game only.
For more info check out this link StarWars.com Downloadable Content Soon To be Unleashed
Monday, September 29, 2008
Star Wars: The Clone Wars on DVD & Blu-ray

The Official Star Wars Site reports that Star Wars: The Clone Wars will be available on DVD & Blu-ray starting November 11th.
Warner Bros. will release "Star Wars: The Clone Wars" on DVD & Blu-ray this November 11th. Single disc and double disc editions will be available on DVD. More......
Warner Bros. will release "Star Wars: The Clone Wars" on DVD & Blu-ray this November 11th. Single disc and double disc editions will be available on DVD. More......
Saturday, September 27, 2008
Darth Vader started the rebellion!!
Begin Holonet Feed .......
Rumors are spreading across the galaxy of records that indicate the rebellion was actually the idea of the Dark Lord himself, Darth Vader.
Early rumors indicated that Vader started the rebellion in an attempt to disguise his own agenda to overthrow the Emperor.
However there are reports now surfacing that the Rebellion was actually the idea of the Emperor himself. The plan was to cause a meeting of the rebels so they could be captured.
So Vader on behalf of the Emperor set cogs turning that would eventually lead to a secret meeting of Bail Organa, Mon Mothma, Garm Bel Iblis and the start of the Rebellion.
Reports say they were captured by none other then Darth Vader himself, but freed buy a brave young Jedi who gave his life for them and for the rebellion.
Brilliant!
Thursday, September 18, 2008
The Force Unleashed Xbox 360 Lockup Fix
So you played a few levels of Star Wars: The Force Unleashed on your Xbox 360 then got bored or for whatever reason you put another game in your Xbox 360 and now when you go to play TFU again, you get a Black screen and nothing else.
Way to go guys at LucasArts! I guess you just assumed that people would play your game from start to finish without ejecting the disc?
Anyway, the bug is bad, but there is a fix for now.
Start up your Xbox 360 while holding down the A button (clears cookies).
Next go to the System Tag on your Xbox 360 Dashboard.
Select Memory, then select Hard Drive and press "Y" to view the device options.
Trust me, this is ok to do, it's scary, but it works.
On your controller,
press and release "X",
press and release "X" again
press and release the Left Bumper (upper left)
press and release the Right Bumper (upper right)
press and release "X"
press and release "X" again.
A box will come up and prompt you do do "System Maintenance".
Press "A"
This will clear the cache on your Xbox 360 Hard Drive.
You can now play the game. It appears to be fine as long as you leave the CD in the drive.
I haven't tried playing something else that is saved on the disk to see if that messes it up too.
Hopefully LucasArts will release a fix for it soon. But I'm doubtful since they don't even seem to be acknowledging that there is a problem in the first place.
I'm seeing posts now that say to delete the demo before you install the full version of the game and you won't have the problem.
Wednesday, September 17, 2008
Unleashed!
Sweet! So I sat down last night and got my Force Unleashed!
To start off, I was glad to see they had fixed the little glitches that existed in the demo (sounds out of sync, skip during Vader talking to apprentice, etc).
And playing Darth Vader was AWESOME.
I did find it a little strange that they let you play the first level as the most powerful force wielder in the Galaxy, then they teach you how to use the controls. Good thing I had played the demo and new what did what. Although I truly believe that you could just walk Vader through the map mashing buttons blindly and survived just fine.
Anyway, when I got to the Tie Factory I was pleased to find out it was not exactly like the Demo. For once MTV was right (Article). The last time I agreed with MTV, I ended up on True Life!
Now unlike so many others, I'm not rusing through this game. I'm playing it slow and enjoying it.
I also bought the novelization of the game and I'm looking forward to reading it.
I just can't decide if I should read first and then play, or vice versa.
Tuesday, September 16, 2008
Got my Force to Unleash!
Stopped by Wally-World this morning and got my unreserved copy of Force Unleashed.
I love the way every Game-Stop and EB-Games was trying to get you to reserve a copy of the game. There were 50 copies at the one Walmart I went to.
Anyway, I haven't got to play it yet and the reviews seem mixed.
We will see........
I love the way every Game-Stop and EB-Games was trying to get you to reserve a copy of the game. There were 50 copies at the one Walmart I went to.
Anyway, I haven't got to play it yet and the reviews seem mixed.
We will see........
Monday, September 8, 2008
San Francisco Best Buy to have Force Unleashed Release Party
Animation World Network (AWN) is reporting that "LucasArts, Sony Computer Ent. America and Best Buy will commemorate the release of the upcoming videogame STAR WARS: THE FORCE UNLEASHED with an exclusive launch party, offering eager gamers a chance to celebrate the saga and get their hands on the first copies of the game."
Some stars and talent from the game will be in attendance.
Get more info: AWN Headline News
Some stars and talent from the game will be in attendance.
Get more info: AWN Headline News
The Force Unleashed Is Only So-So, Reviews Say - Gameworld Network news story
A report on Gameworld Network (GWN) says "The reviews for the greatly anticipated title The Force Unleashed are coming in, and coming in around average. Xbox Magazine gave it a 7.5 out of 10, saying it lacked polish. And horror of horrors, Nintendo Power said playing with the Wii motion controls is not that fun."
Read more : The Force Unleashed Is Only So-So, Reviews Say - Gameworld Network news story
Read more : The Force Unleashed Is Only So-So, Reviews Say - Gameworld Network news story
Tuesday, September 2, 2008
Clone Wars comes to TV + New Clone Wars Game
The Cartoon Network has announced that the "Star Wars: The Clone Wars" tv series will debut on your TV on Oct. 3 (Friday, 9 p.m est.) with an hour-long episode.
The following episodes will be a weekly (half hour) series.
Also check out the Cartoon Network site for a new Clone Wars Game "Fierce Twilight"

The following episodes will be a weekly (half hour) series.
Also check out the Cartoon Network site for a new Clone Wars Game "Fierce Twilight"
Thursday, August 21, 2008
Playing Xbox 360 The Force Unleashed Demo
 So I got up very early Thursday morning to download the Demo for Star Wars: The Force Unleashed from the Xbox Live Marketplace. Of course when I got there I found out that you need to have Gold Membership to download the demo (which I had just let mine expire because it wasn't worth it) so I had to re-enlist.
 Ok, so I download the demo and hop in.
First things being first I went ahead and took the tutorial on how to grip and toss things.
Oh man, this is gonna be good! You use the right trigger to grab something and the left joystick to toss it left or right/forward backward or the right joystick to move it up and down. Check.
Toss some boxs, Check. Break some glass by tossing boxes into it, Check. Toss boxes and smash Stormtroopers, Check. Ok, that's the tutorial. Pretty easy to do.
Now on to the demo. You start off and the first thing you see is a little R2 unit.
So I pick him up and sling him against the wall and he explodes! It was great.
I must have spent the next several minutes simply picking things up and moving them.
You can force hold something forever it seems. Kinda cool. You cannot move when you are force holding something but you can move the object all over.
One of the funnest ways to kill someone is to pick them up and lift them WAY up high, then just drop them and watch them flail as they fall and bounce. This virtual world stuff is way cool.
Or pick him up and toss your saber at him and let it stick in his chest, then drop him.
You can pick a large object up (Tie Bomber for example) and drop it on a group of guys or hold it about 1 foot off the ground and move it around and sweep baddies around with it.
There are combos you can do. Lightning you can zap, a force push that blasts everything in front of you. Very cool. The first time I slung some poor slob into a door and the door bent I just giggled.
Killing the Bosses kinda sucks. You get them weak to a point and then it's a series button pushes that you must do to finish him off. In the demo, the boss is an AT-ST and after you get him down to a point the screen flashes the green A button and you must press A in time, then it shows you the blue X button and you must press it, then the A again and if you miss a sequence you have to work the Boss down again and try the sequence again till you get it right and get a Finishing blow.
I started at the easy level and it was a little too easy. I was laying guys to waste left and right.
Went back and tried the Sith level and it was pretty cool carnage.
All in all a fun game and I'm looking forward to the full blown version.
Monday, August 18, 2008
Get The Force Unleashed demo for Xbox 360 Thursday!

Keep an eye on the Xbox live market place because some time Thursday you will be able to download the demo of Star Wars:The Force Unleashed.
The demo will let players play through one level from the final game, the TIE fighter construction facility.
I can't wait!
Star Wars:The Clone Wars. I'm sorry but....
 I'm sorry, but I liked the new Star Wars: The Clone Wars animated movie.
 I've read tons of Star Wars books from the latest novels to the Scholastic series as well as comic books. I play Star Wars Galaxies, I play Star Wars Console games. so for me, it was another story in the Star Wars universe told using a different method. I can do that.
I though the animation was excellent.
I though the animation was excellent.
I loved the Lightsaber battles.
I thought the plot was acceptable and believeable.
I liked the way the characters looked.
I liked the Digital Marionette style, it reminds me of the Supermarionation used in Thunderbirds, Fireball XL5 and Captain Scarlet (ok, I was really, really young but I remember it).
I enjoyed the relationship between Anakin and Ahsoka
But then again, I kinda liked episodes I-III too. I like just about anything Star Wars.
So sue me, I'll buy the new Star Wars: The Clone Wars DVD when it comes out.
But then again, I kinda liked episodes I-III too. I like just about anything Star Wars.
So sue me, I'll buy the new Star Wars: The Clone Wars DVD when it comes out.
And I'm looking forward to the new animated TV series comeing to Cartoon Network this fall.
Wednesday, July 16, 2008
The Force Unleashed for Apple I-Phone
Gizmodo has some great photos of the upcoming Star Wars: The Force Unleashed video game for the Apple iPhone being put together by THQ.
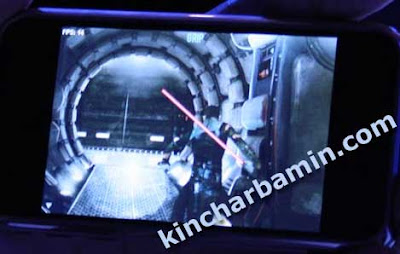 THQ says the game will deliver “an uncharacteristically rich storyline for a mobile game and 2 1/2 to 3 hours of gameplay.” Gameplay is not like the full size console versions. Check out Gizmodo for more info on the game.
 THQ says the game will deliver “an uncharacteristically rich storyline for a mobile game and 2 1/2 to 3 hours of gameplay.” Gameplay is not like the full size console versions. Check out Gizmodo for more info on the game.
Tuesday, July 15, 2008
See Star Wars in ASCIImation
Check this out. You old time Computer hacks will love this.

It's Star Wars A New Hope all done is ascii characters. It's great!
Check it out at the Star Wars ASCIIMATION website
Friday, July 11, 2008
New Lightsaber controller for Xbox 360
Motus Games, has been working on something they call Darwin(tm).

This new wireless controller will offer 6 degrees of movement capture for more realistic response. And it appears to be two controllers in one (it seperates in the middle).
Check out the website for more information.
This new wireless controller will offer 6 degrees of movement capture for more realistic response. And it appears to be two controllers in one (it seperates in the middle).
Check out the website for more information.
Wednesday, July 9, 2008
Force Unleashed Trailer Released
Entertainment Weekly has the been given the OK to show
the new trailer for Star Wars: The Force Unleashed.
This is the Xbox 360 version.
 See it at EW.COM
 Tuesday, July 8, 2008
Rotoscoping a Lightsaber Blade with FXhome EffectsLab Pro
So I finally got a copy of FXhome EffectsLab Pro and I got to tell you, this has got to be one of the easiest and most cost effective ways to rotoscope a Lightsaber blade (and several other effects) in a movie you have made.
After puttering around with it for a little bit I decided it would be fun to rotoscope the same video I had done with Adobe Photoshop and Premiere using FXhome EffectsLab Pro and compare the difference. Unfortunately I didn’t have the original video so it’s a little lower resolution then I would prefer. But for the purpose of this tutorial, it works just fine.
A couple things about FXhome EffectsLab Pro, it is as its name implies a program for adding Effects, visual effects. It doesn’t do audio; it doesn’t do Titles, Subtitles or that kind of stuff. Use Microsoft Movie Maker or some other movie editing software to do that. FXhome EffectsLab Pro is for adding things like Lightsabers, Blasters, Explosions and things like that.
Also as piece of advice, I don’t believe in editing an entire video clip if you only need to apply effects to a section of it so I open my unedited video in Windows Movie Maker, save the project and then use the Split function to cut out just the piece I’m going to edit and save it separately. Now I have a smaller file to work with.
Open FXhome EffectsLab Pro and select the video clip you want to edit.

You’ll see your video clip in the timeline

Advance ahead a frame at a time until you reach the first frame that you want to add the blade. You can either use the left/right keys to move through the movie or you can use the Next field button.
As you can see in the next picture, the Lightsaber blade is just starting to come into view, this is where I will start adding the blade effect.

Click and hold down the right mouse button on the Neon Light effect under the Effects Tab in your Toolbox, now drag the Neon Light effect over onto your video clip you are editing.

Now down on the timeline you will see a layer called Neon Light.
Click on the Crop tool.

Now click on the right end of the Neon Light effect and drag it to the length that you need the effect to last (you can shorten and lengthen it as needed)
Inside that layer you will see a line that says Neon Glow. Single Click on it.

And on the right hand side of the screen, you will see the attributes for that neon glow layer. Here you can change things like the color of the blade or the feathering (fuzziness) of the blade core. This is something you might want to tinker with as it may change with different scenes.
Click on the color bar to change the color.
Then click the Color box to bring up the color palette.
Choose your color and click ok.

Next, back down in the timeline, under the Neon Light layer, click on the line that says Neon Glow and click the little green dot once and turn it red.
This turns the effect of the glow off.
This makes it a lot easier to do the editing; when we are done we will turn it back on.
Next click on the line that says Neon shapes.

Then on the right side of the screen, click on 4-point

We are now ready to start adding the rotoscoped blade effect.
Note: You can use the zoom tool located in the upper right corner above your video to enlarge or shrink down the area you are working in. You can also hold down the right mouse button when you have your mouse over the image to move the screen around.
This is very handy when working on a small area.

Click once next to the hilt of the Lightsaber (where the blade comes out)
Click either on the right side or left side of where the blade is, then click the other side, then go down to the end of the blade, and click the two points of that end.

You must do the handle/hilt end first, then the tip of the blade.
The software needs to know which end is which so it expects you to do it in this order.
You will note that in this frame the end of the blade extends off the edge of the screen.
You don’t need to draw all the way to where the end of the blade would be, but you should go off the screen some to get the glow right.
On the right hand side of the screen you will see the attributes for the effect.
You can curve both ends of the blade by putting a value from -0.50 to 3 in the Hilt curve or Tip curve boxes. A negative value will curve the end inward (you way want this on the hilt sometimes). Use the slider to adjust the curve to your liking. You will most likely change this setting as you go depending on which way your saber is pointing at the time.

Then hit the right arrow key or click the Next field button to go to the next frame.
You will see that the effect you drew from the previous frame is in the same spot, grab the corners and drag the shape to cover the blade again.
Keep repeating the process (saving along the way) until you have every frame done.

Now go back to the timeline and click the red dot next to Neon Glow to turn the glow back on.
![]()
And the effect will appear.

(NOTE:
Real image looks much better, I had to squish this to
make it fit on the screen)
Render your movie, pull it back into Movie maker, add your sound effects and titles and
your done.
Thursday, June 19, 2008
LucasArts talks about 2 new Star Wars games
Acoording to the latest Star Wars Homing Beacon, LucasArts will be unveiling two new Star Wars games based on the Clone Wars animated series coming in August.

Star Wars The Clone Wars: Jedi Alliance for DS and Star Wars The Clone Wars: Lightsaber Duels for Wii are set to be shown at the upcoming E3 next month.
The DS game will feature some cool Stylus control of the Lightsaber and Force powers while the Wii game will supposedly come with LightSaber Controllers (we will see how that works out).
IGN.Com UK has some interesting articles on both games.
Star Wars The Clone Wars: Lightsaber Duels for Wii
Star Wars The Clone Wars: Jedi Alliance for DS
More info can be found at the official game site
Stay Tuned for more.
Wednesday, June 11, 2008

Friday, May 30, 2008
Clone Wars Coming to Wii and DS

According to IGN.com there will be a Clone Wars Animated Series video game for the Nintendo Wii and the DS systems.
I guess nobody else gets to play or maybe there is more to come.
Check out the whole article at IGN for details.
Tuesday, May 27, 2008
There's something fishy going on with this Lightsaber

A Lightsaber fishing pole? A Darth Vader fun net? (for catching jedi?)
Check out the story at TheForce.net and tell me this isn't kinda wierd.
If you look at this image you will see that this was due out in 07 for the 30th anniversary.
Wednesday, May 21, 2008
Jimmie Smits to be Bail Organa in Star Wars: The Force Unleashed
It appears that Jimmie Smits will reprise his role as Bail Organa in the upcoming video game Star Wars: The Force Unleashed.
Check out http://www.imdb.com/title/tt1024923/
Check out http://www.imdb.com/title/tt1024923/
Tuesday, May 13, 2008
Video of Force Unleashed using Wii Lightsaber
 This is too awesome. The Force Unleashed for the Wii will make use of the hand controllers to allow you to wield a lightsaber and unleash your force powers.
Imagine the fun when you slash or jab with one hand and the Lightsaber on the screen slashes and jabs with you, or you push your hand out and blast someone with the force.
Dueling with your Friends may never be the same again.
Check out the videos at Kotaku.com and ComputerandGames.com
Friday, May 9, 2008
Clone Wars Trailer Online
Now available for viewing online the Trailer for
Star Wars: Clone Wars.
I can't wait!
Wednesday, May 7, 2008
The Trailer & Poster for Star Wars: The Clone Wars
Set your DVR/TIVO/VCR for Thursday May 8th, 7:58pm (all time zones) for the TV premiere of the trailer for Star Wars: The Clone Wars on Cartoon Network, TNT, TBS, CNN, and Boomerang. Hopefully you get at least one of those channels.
Quoted from the Official Site:
"Star Wars fans will get an unprecedented look at the newest intergalactic adventure on Thursday, May 8, when the world-premiere trailer for the upcoming CG-animated movie Star Wars: The Clone Wars debuts across five Turner networks simultaneously."
Go to the Official site for more info
Tuesday, May 6, 2008
Monday, May 5, 2008
Modifying my Joe Jedi FX Saber
So I only had my new Radio Shack Master Replicas Force FX Lightsaber Construction Set for about a week before I had to open it up and see what made it tick. It wasn't too hard (I'll post some pics later) to open it up and find out what was in there. I found some helpful instructional videos on You Tube that covered it pretty well.
Basically it's setup like the LUX conversions that ultrasabers.com offers. It uses a 3 color 1 watt LED and lens as opposed to the string of LED's that the other FX sabers have.
I ended up changing the blade color to teal (Sunriders Destiny) by cutting the lead going to the green led and connecting it to the blue lead. By using a 3.3 ohm resistor on the blue wire it made a nice Teal/Cyan color. Without the resistor it was more of a light blue.
I used the two blank/empty pieces of the saber kit and added my own grips to them making it a totally unique saber.
Monday, April 28, 2008
Hasbro to make Force FX Lightsabers
As many of you know, Master Replicas will no longer be making Star Wars collectibles.
This includes the Force FX Lightsaber line.
Fortunately, Hasbro has announced that they will be making the sabers now.
They have said that very little will change. They intend to continue with the existing Lightsabers just as they are. Another company, eFX will also be entering the arena as a Star Wars collectibles supplier. They are already announcing a StormTrooper helmet available for preorder.
Be forewarned however, there is a very limited number that is being produced and those folks who's orders were not filled by Master Replicas get an option to get one first.
You can get more information at the official Star Wars site.
Thursday, April 24, 2008
Master Replicas™ SW-616 review

Master Replicas SW616 Force FX Lightsaber Construction Set.
AKA The "Joe Jedi Lightsaber"
This is the coolest thing to come out lately. It's from Master Replica's and it's only available at Radio Shack (and well Ebay or other folks that are reselling them. I got mine on sale for $44.95.
This is a kit that allows you to build a custom Lightsaber from 3 different Emitters, Foregrips, Activation switches, Grips and Pommels. (that's 3 of each).
The emitters and pommels are metal, everything else is plastic.
You basically get one emitter that is a cross between Luke's Ep4 saber and Obi-Wans Ep1/Ep6 saber. One that looks like Vader's black shroud from Ep4 and a silver one like Ep6.
Foregrips are Silver tube like Vaders, Black Grips like Obi-Wan's EP1 or Disc Grips like Luke's Ep4.
The switch/activation sections are one like Luke's Ep4, Vaders Ep4, or one I have never seen before (kind looks like a Doorbell button).
The Grips are either a solid silver tube like Luke's Ep4, 4 large black grips like Yoda's Ep5/6 or the Wiper Blade look of Vaders or Luke's Ep4/5 sabers.
The Pommels are pretty basic 2 round ones that look likes versions of Vaders and one that reminds you of Luke's Ep4 one.
You start off with a Plastic Tube that houses the batteries, sound module and light.
The blade is already attached and not removable.
You slip on the Pommel, Foregrip, Switch, Grip of your choice and screw on the pommel and you have a saber.
There is a switch that controls the color for the bladge (red/blue/green).
The blade is a little shorter then a standard Master Replicas saber but all in all, for the price, I don't think you can beat it.
The blade is not done the same as the regular Master Replica Lightsabers.
This one only has one buld in the Hilt and it shoots up the blade.
I'll be going back and getting another one so I can see what I can do with it.
Since it's all based in a tube, maybe I can find some other custom wrapper for this thing and totally make my own version of a Master Replica's saber.
Tuesday, April 22, 2008
Make Your Lightsaber Glow
I will assume that you can have an AVI or .MPG file of
someone twirling something that will be the lightsaber.
I'll also
assume that you have some basic understanding of how to use Adobe
Premiere and Photoshop.
This process is often referred
to as Rotoscoping.
someone twirling something that will be the lightsaber.
I'll also
assume that you have some basic understanding of how to use Adobe
Premiere and Photoshop.
This process is often referred
to as Rotoscoping.
The first step is to load the movie into Premiere and
edit it.
Use the Razor tool to mark segments where you
do and do not see the saber blade in the frame. It is not required
but it makes sense. This way you can edit the individual segments
which load and write much faster in Premiere and Photoshop. Why edit
the entire film when you only need to edit the frames where the
blade is visable.

After you make all the segments, save this
step so you have a master template
Next select the a segment you need to edit (start with
the shortest one for your first try), click on it once to select
it,

and export the segment as a Filmstrip.

Now load Photoshop and open the .flm file you created.
It will look something like this.

Note: The steps from here down to the point of saving
the file back to premiere's .FLM format are the same steps you
would use to edit a still shot of a Lightsaber.
Add a new layer (from the Layers menu, select new and
then layer).
(Special Note: If your
movie has multiple sabers in the same shot you must create a
different layer for each saber color and repeat the process for each
layer)
![]()
Enlarge the image so you can see one frame at a time
on your screen.
Now select the lasso tool

and draw a box around the area of the blade.

Now select your fill tool (the paint bucket)
and fill the area with white.

Now repeat the last two steps for every frame in the
strip needs to be done.
(also repeat for each layer if you have
multiple sabers in shot)
This can be a long slow tedious job.
Take your time and take a few breaks if you need to.
You can
save your work as a .PSD file at any time and should just so you
don't spend an hour doing this and your PC hangs up and you loose
everything!!
Once you have done all the frames.
If you haven't saved
your work, do so at this time before proceeding.
This way, if
after your done you don't like the effect on film, you can come back
to this point and try again.
From the Filters menu, select Blur and Gaussian
Blur.
Now here is where you have to start fooling
around.
Depending on how big the image of the blade is in the
shot will depend on how much blur you really need.
Move the
slider around a little till your image is just a little
fuzzy.
Write down this setting so you know what looks good.

Next from the Layers menu select Effects and Outer
Glow.

Again, this is where you get to play some.
Pick the
color you want your blade to be. If you choose a custom color, write
it down.
I like 100% opacity, 25 pixels of blur and 255%
intensity for this shot, it might be different for you.
Again, it
depends on the size of the blade in the shot, the lighting of the
shot and what have you.
Experiment until you get the effect you
want.

(Special Note: If your
movie has multiple sabers in the same shot you must repeat the
process for each layer)
Save this file (with a new name).
Now from the Layers menu, select Flatten
Image.
Once you have done this, do NOT edit the file
or save it again. When you close Photoshop, it will ask if
you want to save your changes, answer NO.
Once you flatten an
image, you cannot go back and change the glow effect.
Now save the file as a Filmstrip giving it a new name
then what you had exported out of Premiere.
Go back to Premiere, load this Filmstrip and edit
it.
Select the segment that you originally exported and delete
it.
Now replace it with the edited version (the .FLM
file)

Save the project and repeat until you have all your
new segments in the movie.
Export the movie out and watch your
Lightsaber glow!
See More Lightsaber Stuff at
http://www.kincharbamin.com
Subscribe to:
Posts (Atom)